

🆓 GitHub + Netlify + hashnode = Website/Portfolio With a Blog For Free
Host your small website or portfolio with a blog for FREE with an optional paid custom domain.


⚠️ Note: Just to warn you before you keep reading. This way of setting up a website or portfolio is useful only if you won't receive a lot of traffic. Netlify has a bandwidth limit of 100GB which should be enough if you are hosting a small website or a portfolio. It's not a solution for large, established websites. In that case paid hosting is an option to go with.
Short Intro & Steps
If you are just starting to build your online presence maybe you are not looking to spend a lot of money right on the start (or just get something cheaper because you can?). If you are someone who just needs a place where you can show off your work and have a small website or a nice portfolio that you can maybe link on your resume then this might be a quick and easy solution for you.
On the other side, your blog is not restricted in any way.
Here are 9 simple steps that are necessary in order to do the setup:
Design & Develop a Website/Portfolio
Push Code to Git
Register on Netlify
Create a new site from GitHub
(Optional) Buy a Custom Domain
Create a subdomain for the Blog
Register on hashnode
Connect hashnode Blog With Subdomain
Link the Blog with Website
Design & Develop a Website/Portfolio
If you are reading this article on hashnode that probably means that you are a developer so this part is entirely up to you. Design your website, develop it in the technology of your preference and build it. (or simply steal it from somewhere 🙈)
Push Code to Git
After you have designed your beautiful website or portfolio push your code to an online Git repository. Netlify currently supports GitHub, **GitLab **and Bitbucket for an automatic deployment.
Register on Netlify
Go to app.netlify.com and create an account. There are no special things that you should do, just a regular signup.
Create a new site from GitHub
After a successful creation of the account you should be able to see the **Sites **section in the Team overview tab.
This is what you should be able to see:
Press the New site from Git button. A new screen should show up asking you to select your Git repository provider. Select the provider where you pushed your website code to and after select the exact repository where your code lies.
After this step you should see Netlify deploying your website to a randomly generated domain. (me-no-payee-123456.netlify.app)
You can keep this domain which is free or you can upgrade your game and get a custom one for a few bucks.
(Optional) Buy a Custom Domain
As noted, this is entirely up to you but I strongly suggest you to get a custom domain because that leaves a far better impression to the person visiting your site.
You can go to some of the popular domain providers like Namecheap , GoDaddy or any that suits you.
I'm not a promoter/affiliate but I want to say that my choice is **Namecheap **and I strongly suggest it since the experience with their support team was always of top quality.
For instructions on how to connect Netlify with your Namecheap domain check this guide.
(Yes, I'm too lazy to write this part)

Create a subdomain for the Blog
To create a subdomain (example: 'gib.nomoneyz.com') navigate to the **Domains ** tab and there you should see a list of your main domains. Click on the domain that you want to append the subdomain to.

Now you should see a button that says Add new record. Press it and fill out the form so that in the end you get settings like shown below:
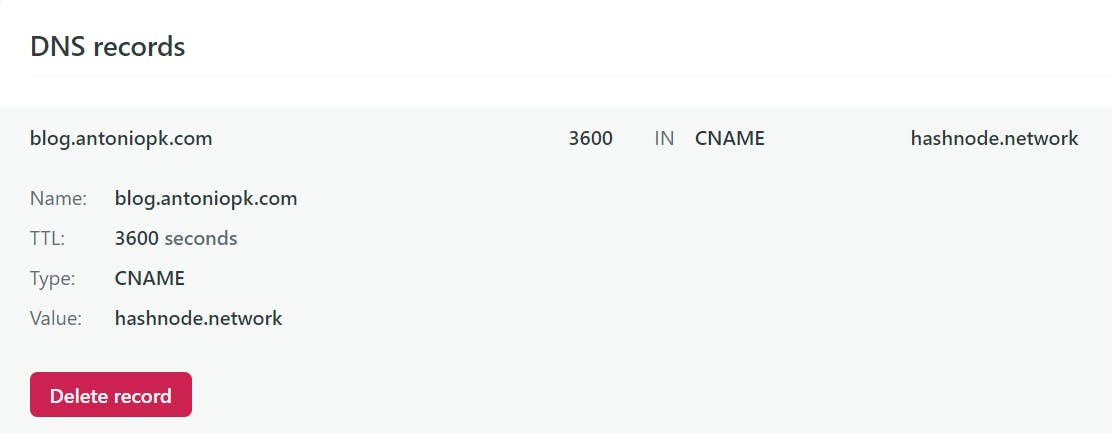
It's important to select the CNAME record since that type is used to map a subdomain.
Register on hashnode
Head over to hashnode.com and create and account. You can spend time customizing your new blog or you can leave that for later. I suggest you to match the colors and the logo with your website for a more seamless transition when we connect the two later on. (since you can't really customize the blog THAT much)
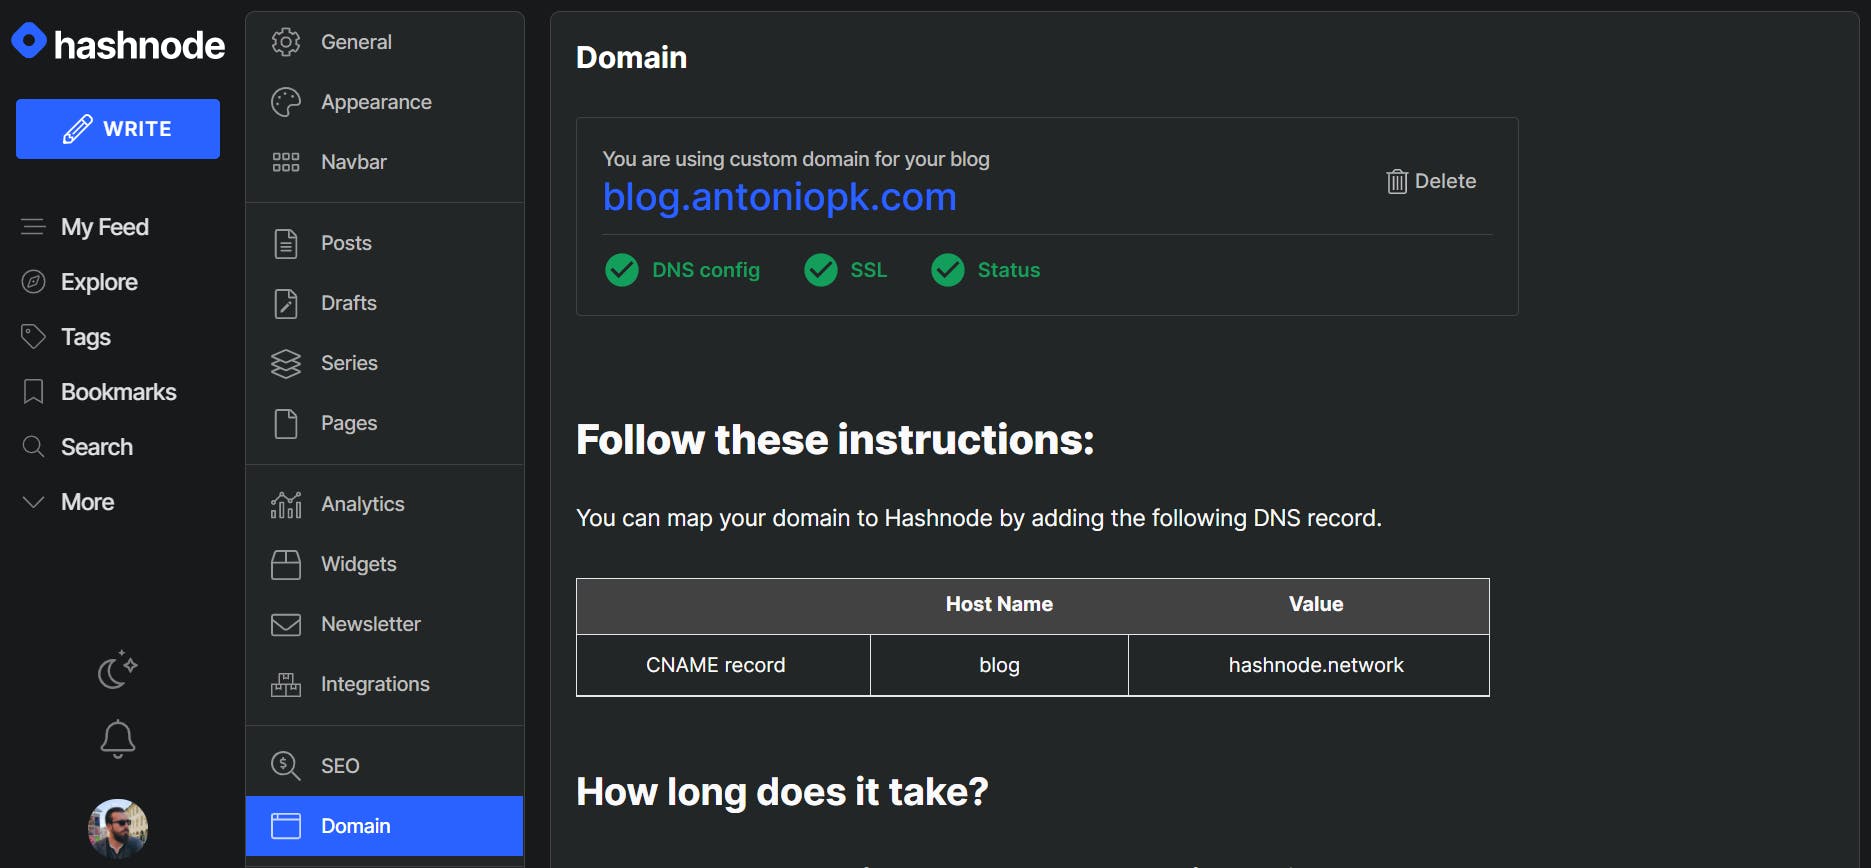
Connect hashnode Blog With Subdomain
Press on your profile image and go to the Blog Dashboard. There select the **Domain **section and add your recently created subdomain. Use the same DNS settings as before and a few minutes after completing the setup you should see all three statuses turn green.
If you visit the URL it should take you to your blog.
Link the Blog with Website
This one is pretty self explanatory. Place the link of your blog somewhere on your website (maybe in the navigation or wherever you like) and push the code to the repository again.
🎆 Enjoy
Everything is done and all you have to do now is to share your site with others!

If you found this mini guide helpful please share your website link in the comments. I'm interested in what you will come up with! 😄
Original post here: https://antoniopk.com/github-netlify-hashnode-website-portfolio-with-a-blog-for-free/